Why You Need To Cool Your Wort
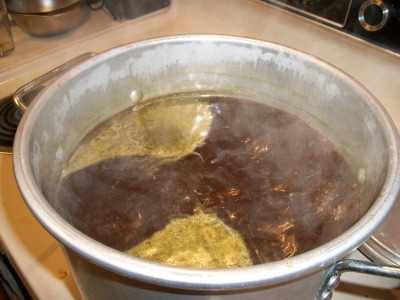
First off, a little bit of a background. Wort is the pre-fermented mix of water, malt and any other ingredients that you use, that will turn into beer.
Second off, there’s a few reasons why you need to cool your wort.
The yeast that we use to turn our wort into beer are picky and will only work when they’re in a temperature range that they like. For ale yeast, they like a range that’s between 65-75 degrees Fahrenheit. Those lager yeasts like things a little cooler, about 45-60 degrees. The actual temperature varies depending on the yeast, so make sure you check your recipe instructions and/or the yeast packaging so you know exactly what temperature they really like.
When you cool the wort, it reduces the risk of infection from bacteria that want to ruin our beer. The bacteria love the warm temperatures (pretty much anything below boiling), so the quicker we can chill our wort and pitch the yeast, the less we have to worry about bacteria.
The quicker the wort is cooled, the clearer the final product will be. The rapid chilling forms a “cold break,” a group of proteins that are thermally shocked and fall out of the wort, to the bottom of the kettle. If we cool down the wort slowly, we won’t get that cold break and the final product will have the dreaded chill haze. Chill haze is caused when you refrigerate your beer and proteins form a haze in your glass. The haze fades away as the beer warms, so it’s mostly a cosmetic problem, although some people say that beers without a cold break go stale faster.
How Beginners And Extract Brewers Can Cool Their Wort
Top It Off With Cool Water
Us, extract brewers are only brewing 2-3 gallons of wort, so we have room to add cold water in the primary fermenter. Adding water does more than just increase the volume to five gallons, it also cools down the wort.
Tips:
Cool the water in the refrigerator over night in a clean, sanitized and sealed container to keep out bacteria and aromas from other items in the fridge.
Aerate the water before adding the wort. You can do this by shaking the pail or carboy for about a minute.
Don’t add the hot wort to the carboy first, the intense heat can crack it. Instead, add the cold water to the fermenter first, then add the wort. Finally add more cold water to bring it to five gallons, if needed.
One drawback to just mixing water with the wort is that it will leave the proteins in with the wort. The way around this is to transfer the wort to a bucket that already has cold water in it, then transfer that mix without the proteins and sediment to the primary bucket to ferment.
Cool It Down With An Ice Bath In The Sink
An ice bath is putting the covered brew pot into the sink and filling the sink with water and ice. The cooler water absorbs the heat away from the wort. The quicker you cool it down, the better of a cold break you’ll get, so this is an upgrade from just topping your wort off with cool water and can be used in conjunction with adding the wort..
Each homebrewer has their own version of an ice bath. I like to do a mix of ice and water up to almost the top of the brew pot, changing the water whenever it starts to get warm.
I know other brewers that like to add just cold water first, then after that warms up replace the water with ice.
Tips:
You’ll need three to four pounds of ice per gallon of wort. Don’t add those ice cubes directly to the wort, add them to the sink around the brew pot.
Keep your brew pot covered when you’re adding the ice and the water, but once things settle down, you can keep the lid off and gently stir the wort with a sanitized spoon to cool it down quicker. Emphasis on gently! Stirring the wort pushes the hot wort from the middle of the pot to the cooler spots near the edge of the brew pot.
Don’t worry about checking the temperature until the brew pot is cool to the touch.
If you’re cooling the wort with an ice bath, then adding extra water in the primary to top it off, you don’t need to cool the wort down completely to the target range. Just cool it down to where it’s cool to the touch, then transfer it to the fermenting bucket or carboy.
Use A Wort Chiller
A wort chiller is a small investment (about $50-$150 for most models), so it’s something you don’t have to buy if you’re just starting out. However once you have a few batches under your belt, I have a feeling that you’ll want to get one of these for yourself.
A wort chiller is quicker (only about 15 minutes) than the other methods and is easier than maintaining an ice bath.
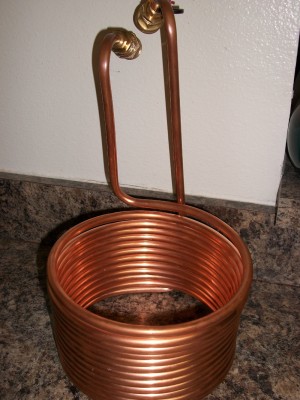
The technical name is an immersion wort chiller, but you can call it wort chiller for short and most homebrewers will know what you’re talking about. It’s made out of metal, usually copper and is shaped in a coil. You add it directly into the brew pot with the hot wort (so make sure it’s sanitized). One tube leading to the coil is attached to the faucet. When you turn on the faucet, the cool water flowing through the coil absorbs the heat, taking it with the water as it drains out through the tube attached to the other end.
After the boil is over, turn on the faucet and send water though the chiller. Use a clean pot holder or ove-glove to hold on to the top of the wort chiller, push the wort chiller through your wort a few times. This gets the wort circulating and you’ll have better results. Make sure the pot holder doesn’t come in contact with the wort.
Once the outside of the brew pot is cool to the touch, check the temperature to see if it’s in your target range with a sanitized thermometer.
Tips:
Put some sort of weight on the end of the tube where it drains into your sink so that it doesn’t move around.
You can keep the lid on to prevent bacteria from getting into the brew pot, but it will cool down quicker with the lid off.
Use the draining water to water your plants, fill up your washer. It’s clean since it stayed in the copper tubes, so you don’t have to worry about it making a mess.
Do you have any wort chilling tips or tricks for other homebrewers?
—
Stay up to date with Passion For The Pint via Facebook, Twitter or subscribing to the newsletter (and free homebrew ecourse).


Nice blog! I made my own copper wort chiller recently for under 50.00 with items bought from Home Depot (15.00 of that was spent on a tube bender) Oh well.. at least I have it in case any of my home brewing buddies need one built. This is one of the best upgrades I’ve made to my brew setup! We’re talking a 10 to 15 minute cool down now. The investment will pay for itself quick, as I usually had to get two to three bags of ice @ at two bucks+ per bag.
Thanks Darrin! I thought about putting one together, I read a couple of tutorials about it, but kept putting it off. Then my fiancee, now wife bought me on for Christmas.