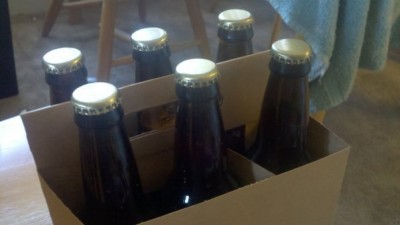
 There’s three really exciting days in the homebrewing process, with a lot of waiting in between. The first, is brew day when your brew your ingredients together. The second is bottling day and while it’s probably not as exciting as the third, the day you drink your beer, it’s a pretty important day.
Before you start bottling your beer or even setting up the equipment, you need to make sure that beer is done fermenting. If there’s still bubbles flowing in the airlock or your brew hasn’t hit the optimal final gravity for the recipe, you may have to hold off until another day bottle your beer.
However, if the fermenting is done, it’s time to get down to business.
Bottles
You’re going to need somewhere to put that all that beer. Unless you plan on kegging it, you’re going to need some bottles, about 48-52 of them.
You can get the bottles at your local homebrew store or better yet, drink some quality craft beers and recycle them for your next batch of beer. Avoid ones with screw caps and any that aren’t the brown color.
I like to clean off the labels with a soaking in hot water and Oxyclean or Baking Soda. After sitting in the water for thirty minutes (often less), many labels will easily come off. Don’t forget to clean out the insides of the bottles!
Time To Come Clean
Now, it’s time sanitize your equipment. I hope you didn’t think that the only sanitizing you had to do was on brew day because today you’ll need to make sure your bottles, bottling bucket, bottle caps, hoses, spigot and any other equipment is sanitized.
Sugar Rush
You should have some priming sugar leftover from your ingredient kit. I’ll admit that I thought that this was one of the ingredients that I was going to need on brew day, but in reality it actually needs to be added on brewing day because it’s what gives your beer the carbonation.
The priming sugar is boiled with a cup of water until dissolved then left to cool.
Bucket Time
After the priming sugar is cooled, it’s poured into your bottling bucket. Then you siphon your beer from the fermenting bucket to the bottling bucket. Avoid picking up any of the sediment into the siphon.
Now The Fun Part
If you’re like me, you may want to do this on a floor that’s easy to clean or place a towel where you’re going to be working.
Attach that tube to the spigot and bottle filler.
Take one of your sanitized bottles and put the bottle filler in it. Push the filler down on the bottle on the base of the bottle and your beer will start to flow in. Lift the filler as the beer reaches the top of the bottle. When you pull out the filler, you’ll have just enough room left for air in the neck of the bottle.
Cap your beer and rinse if you like to make a mess like me.
Bottle Conditioning
Store the beer in a cool, dark place for the next one to six weeks (depending on the recipe). I know you don’t want to wait any longer, but this is the part where your beer becomes carbonated and all of the ingredients blend together to make deliciousness.
Getting Close
Finally you get to put your beer in the fridge. Some recipes call for another week or two of refrigerator conditioning, while other recipes just make you wait 24 hours for your beer to cool.
Finally!!!
Drink your beer and start planning for your next home brew!