We’re almost done going over the required home brewing equipment list, but there are a few things left. The good news is that we’re now talking about bottling day and the end is in sight, your beer is almost done!
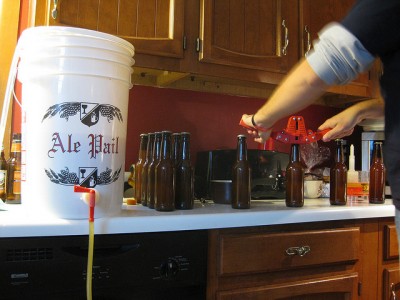
Bottling Bucket: You don’t need a bottling bucket, but it will make your life a whole lot easier. Basically after your beer is done fermenting, you transfer it from your fermenting bucket (or carboy) into your bottling bucket. These two plastic buckets look a whole lot the same, but what makes it different is that it has a hole drilled into it where you attach a spigot and you don’t need a lit for it.
Spigot: The spigot is pretty self explanatory, you can buy one at a home brew shop for about five bucks.
Racking Cane: The Racking cane is another piece of equipment that’ll make your home brewing a whole simpler. You could siphon your beer from the bottling bucket, but it’s a whole lot easier with a racking cane and definitely worth the price tag. You attach the racking cane to your tube, which attaches to the spigot. Then when you press the racking cane against the bottom of a beer bottle, beer will flow into it. When you pull it up, it’ll stop flowing. Genius, I say! They even make a steel mesh filter to put on the end of your racking cane to help clarify it, I’m definitely picking up one of those soon.
Bottling buckets, spigots and racking canes, are all pretty simple, but I do have one tip. Keep the spigot over the edge of the table or counter. Because of how low the spigot is, it can get knocked out of whack if you try to set it on a flat surface and things can get messy. Trust me, I learned that the hard way!
—
Photo by Ben+Sam.
